
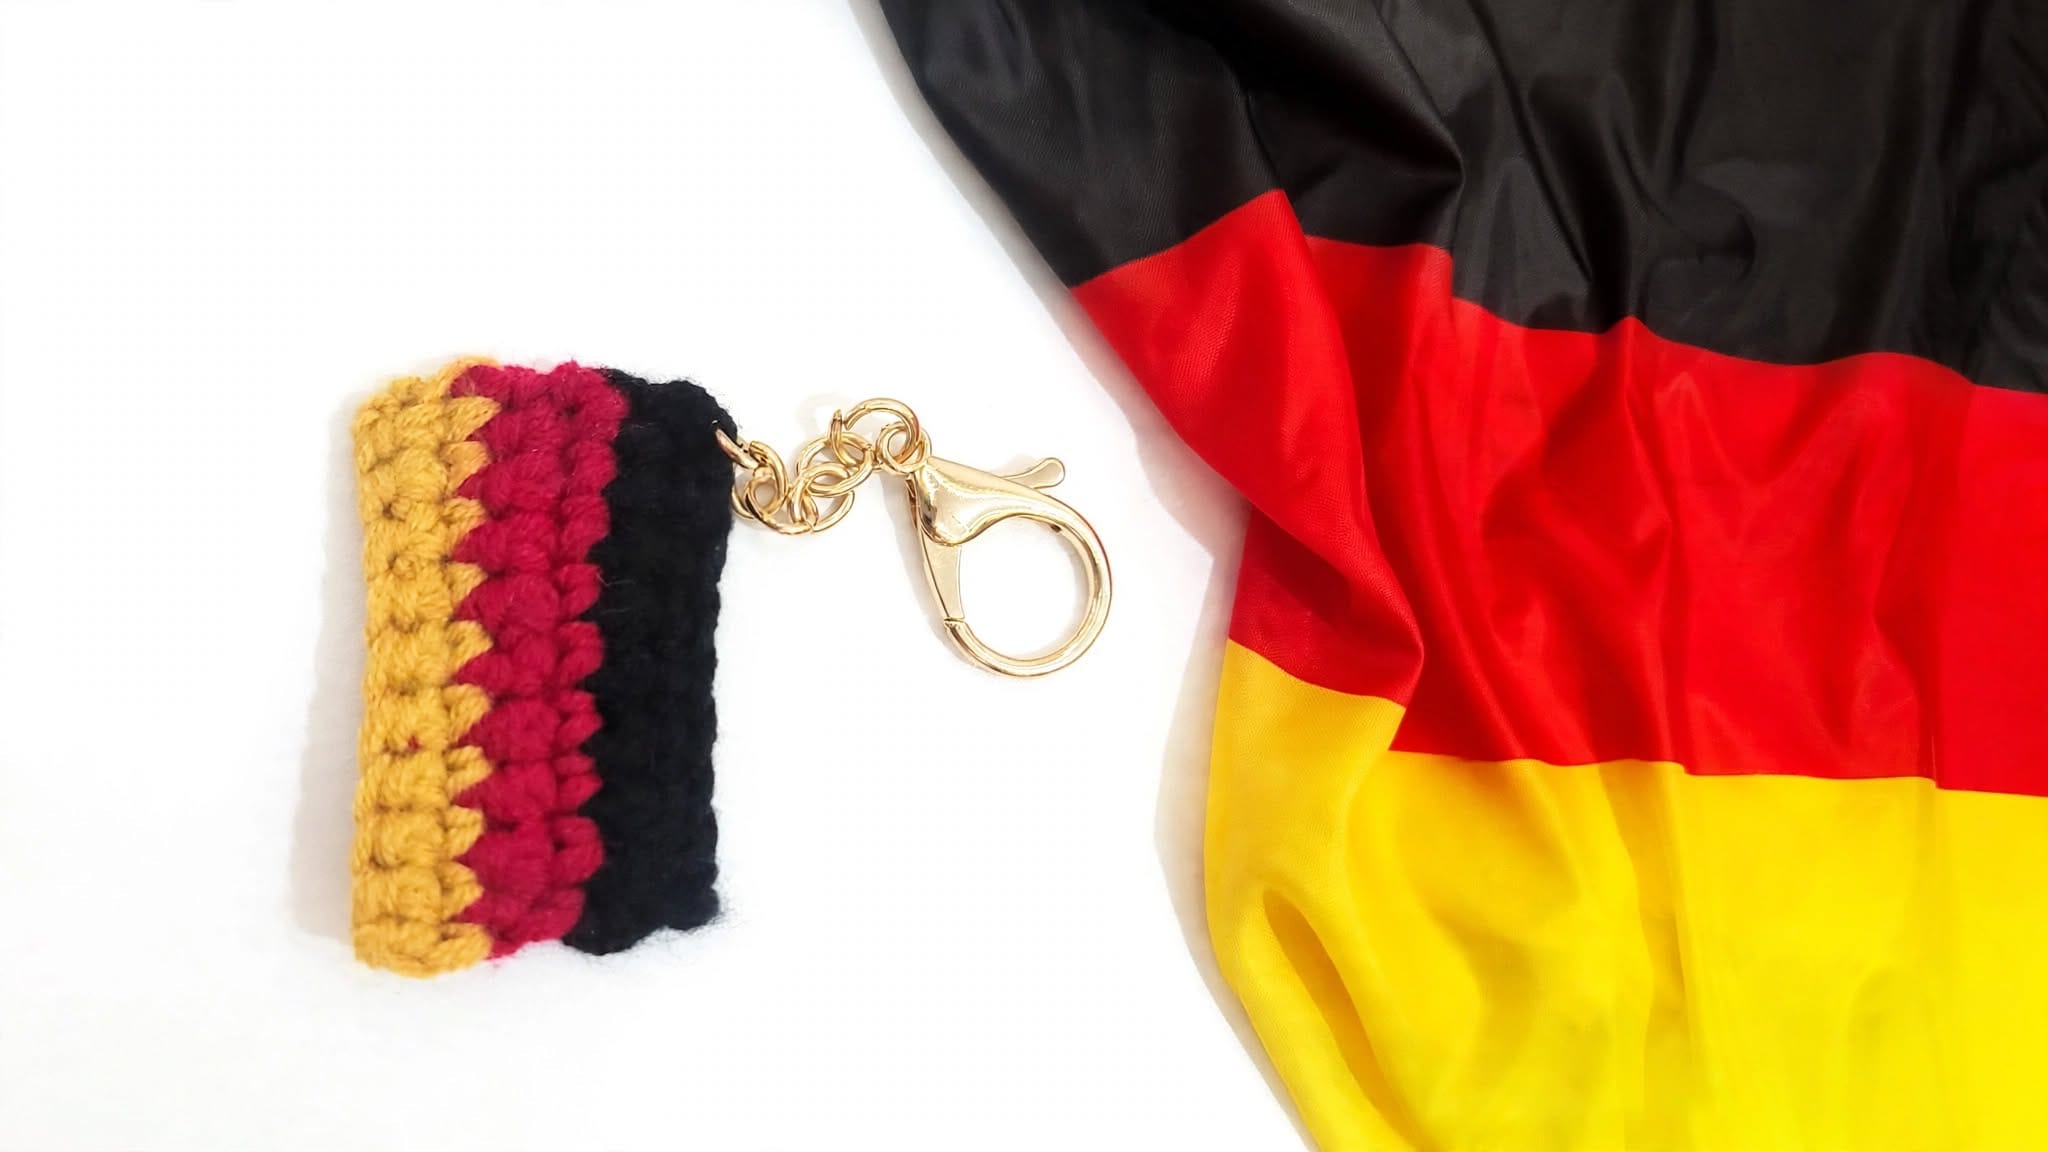
This is the first pattern I have filmed from start to finish, and I chose a small one on purpose. A flag keychain is about three hours of work, it uses scraps you already have, and when it is done it actually looks like something you would buy.
The German flag is three clean horizontal bands — black, red and gold — which makes it a perfect first colour-change project. You only ever work single crochet. If you can chain and single crochet, you can make this today.
The full tutorial is below. It is 13 minutes, filmed close up, with no talking — so you can follow my hands at your own pace and loop back as many times as you need.
Watch the full video tutorial
13:23 · no voice-over, close-up hands · Watch on YouTube ↗ · Subscribe to the channel
What you will need
- Yarn: 100% microfiber, in black, red and gold / yellow. A few metres of each — this is a perfect scrap-buster.
- Hook: 3.0 mm
- Keychain hardware: a split ring, or a lobster clasp if you want to clip it onto a bag
- Yarn needle, scissors
- Optional: a stitch marker for the first stitch of each row
Why a 3 mm hook with this yarn? It is smaller than the label will tell you, and that is deliberate. A tight gauge keeps the fabric stiff and flat so the flag holds its rectangle shape instead of curling in your pocket. If your flag is floppy, go down a hook size.
[PHOTO — ton matériel à plat : les 3 pelotes, le crochet, l’anneau]
Abbreviations (US terms)
- ch — chain
- sc — single crochet
- st / sts — stitch / stitches
- sl st — slip stitch
Free written pattern
The whole flag is one flat rectangle, 10 stitches wide and 6 rows tall, worked in three colour bands of 2 rows each. You turn at the end of every row, and the turning chain never counts as a stitch.
Foundation
Make a slip knot and place it on your hook.
With black: ch 11.
Row 1 — black (1st of 2)
Skip the first chain. Sc in the next 10 chains. (10 sc)
Ch 1, turn. The ch 1 does not count as a stitch.
Row 2 — black (2nd of 2)
Sc in each st across. (10 sc)
Change to red on the final pull-through (see the colour-change tip below), then ch 1 and turn.
Rows 3 & 4 — red (2 rows)
Sc in each st across. (10 sc)
Ch 1, turn.
On the last red row, change to gold / yellow on the final pull-through, then ch 1 and turn.
Rows 5 & 6 — gold (2 rows)
Sc in each st across. (10 sc)
Do not ch 1 at the end of the final row.
Finishing
Fasten off and cut the yarn.
Weave in all ends on the back with your yarn needle.
Attach the keychain hardware through a corner stitch.
Finished size: approximately 5 × 3 cm.
Keep the three bands equal. The real German flag has three bands of the same height, so each colour gets the same number of rows. If your tension is looser or tighter than mine, add or remove a row per band — just keep all three the same.
[PHOTO — ton porte-clés fini, à plat, sur fond clair]
Three things that make the difference
1. Change colour one stitch early
This is the single tip that separates a neat flag from a messy one. Do not finish the last stitch of a band in the old colour. Work it until you have two loops on the hook, then pick up the new colour and pull it through those two loops. The row ends cleanly and you get a straight, sharp colour line instead of a stepped one.
2. Do not carry the yarn up the side
On a piece this small, carried floats show through and make the edge lumpy. Cut each colour and weave the tail in later. You will have six ends to weave in. It takes five minutes and the result is twice as clean.
3. Count the first and last stitch of every row
Losing a stitch at the edge is the most common beginner mistake, and on a flag it is immediately visible because the rectangle goes crooked. Keep it at 10 stitches, every row, no exceptions. A stitch marker in the first stitch of each row solves it entirely.
Make it in other flags
The structure is three horizontal bands of 10 single crochet, which means you can swap the colours and get a whole set. These all work with exactly the same pattern:
- Germany — black, red, gold
- Netherlands — red, white, blue
- Austria — red, white, red
- Russia — white, blue, red
- Hungary — red, white, green
- Bulgaria — white, green, red
For vertical-striped flags like France, Italy, Belgium or Ireland, work the same rectangle but change colour within each row instead of between rows. That is a step up in difficulty — I will film that one next.
If you like small quick projects like this, you will probably enjoy my mini toilet paper roll keychain and my letter keychain pattern — both are free and both work up in an evening.
[PHOTO — le porte-clés accroché à un sac ou à des clés, en situation]
Want something bigger to make next?
This keychain is a warm-up. If you have caught the amigurumi bug, my PDF patterns are ad-free, printable, and written the same way I film — one small step at a time.
Instant download
Browse the PDF pattern library
Printable, ad-free, step-by-step photos. Yours to keep forever.
See the patterns →Lifetime access · Instant download · US crochet terms
Frequently asked questions
How long does this keychain take?
Around two to three hours the first time, including watching the video alongside. Once you have made one, the second takes under an hour.
Can I use cotton or acrylic instead of microfiber?
Yes. Cotton gives the crispest edges and the flattest flag — it is arguably the better choice. Acrylic works fine too. Avoid anything fluffy or fuzzy, because the colour lines will blur and the whole point of a flag is the clean bands.
Is this suitable for an absolute beginner?
Yes. You need the chain and the single crochet, and that is all. If you are not sure about either, read my guide to the single crochet first, then come back.
Why is my flag curling at the edges?
Your tension is too loose for the yarn, or you are accidentally adding a stitch at the end of rows. Go down a hook size and recount to 10 on every row. A flat rectangle should lie down on its own.
Can I sell what I make from this pattern?
Yes — sell the finished keychains at your markets and in your shop, as many as you like. Please do not resell or republish the pattern itself or the video. A link back to this page is always appreciated.
New free pattern every week
I am filming a new beginner tutorial every week. Get them in your inbox before anyone else.
Join the newsletterThis is tutorial number one, so I would really like to know how it goes. Which flag are you making? Tell me in the comments, and tag @ichraq.crea if you share a photo — I repost every single one.