
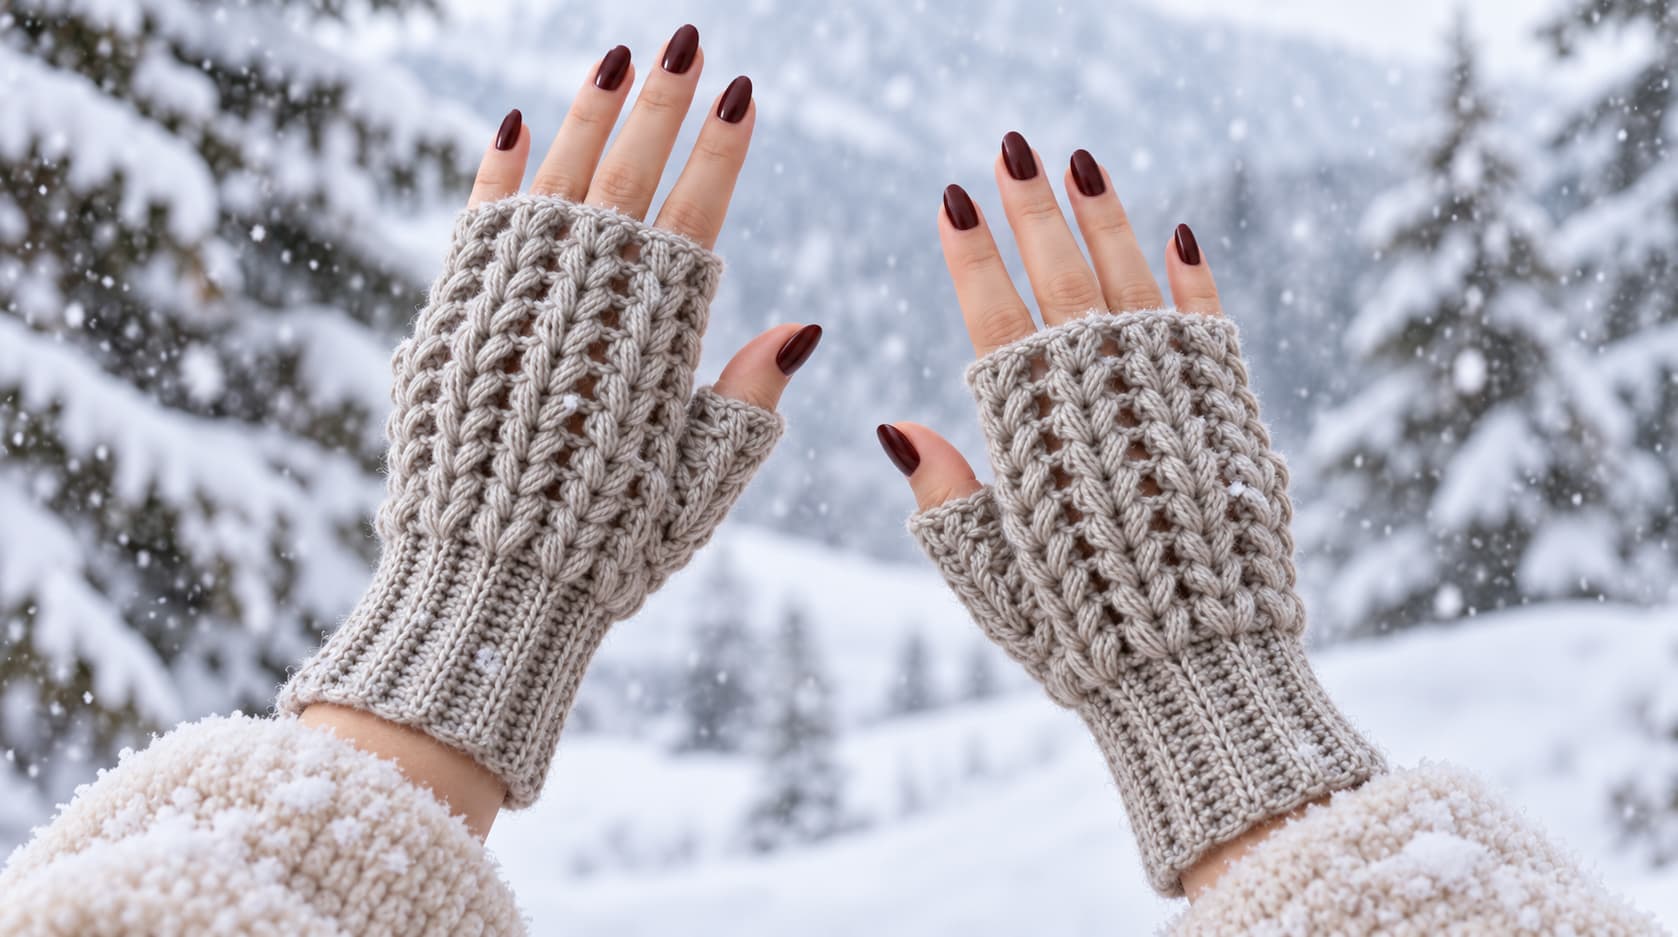
These textured crochet fingerless gloves combine a stretchy ribbed cuff with raised puff V-stitch panels and an open thumb. The pattern below is written as a made-to-measure prototype: instead of promising one universal stitch count, it uses your hand measurements and a gauge swatch to choose the width and length. Make a small swatch first, and try the unfinished piece on before seaming.
Pattern status: this is an original draft based on the visible construction in the supplied reference images. It has not been physically crocheted or fit-tested by Ichraq Crea. Treat it as a prototype; check the swatch and fit as you work. The reference photos are included in this working pack only—upload them publicly only if you hold the necessary usage rights.
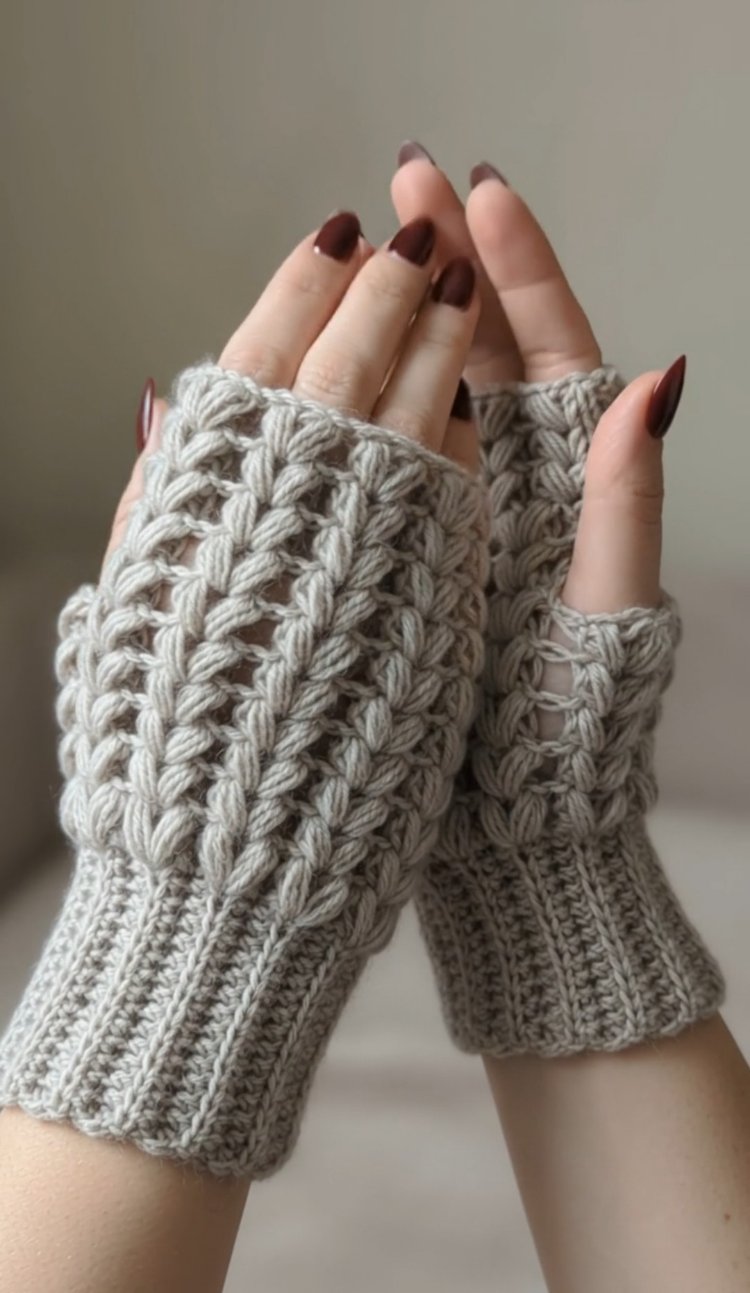
At a glance
- Skill level: Confident beginner (comfortable with single crochet, chains, joining, and counting)
- Construction: ribbed cuff ring plus a flat hand panel, seamed with a thumb opening
- Terms: US crochet terms
- Fit: adjustable to hand circumference and desired length using a swatch
- Pair: make two matching panels; mirror the thumb opening if the seam is placed to one side
Materials
- DK or light-worsted yarn with good stitch definition; use the same yarn for both gloves
- Crochet hook suited to the yarn and your swatch (start with the yarn label recommendation)
- Stitch markers, yarn needle, scissors, flexible tape measure
Puff stitches use more yarn than a flat stitch. Make a swatch and estimate yarn needs before choosing a final amount. A smooth, pliable yarn makes the texture easier to see; very fuzzy yarn may blur the V shapes.
Measurements and gauge
Measure the hand around the widest part of the palm, below the knuckles and excluding the thumb. Also measure from the wrist crease to the point where you want the glove to stop. Measure from the wrist crease to the base of the thumb to help place the opening. Use the intended wearer’s hand, not a generic size chart.
Make a swatch at least 4 in / 10 cm wide in the puff V-stitch used below. After it relaxes, measure the width of several complete V-puff columns and the height of several rows. Record:
- Repeat width (RW): width of one complete puff-V column, including its share of the spaces between columns.
- Row gauge (RG): number of rows per inch or centimetre.
- Cuff gauge: rows per inch or centimetre in the ribbing, measured relaxed and gently stretched.
Planning formula: divide the measured hand circumference by the swatch width of one puff-V column, then round to a whole number of columns. Multiply that column count by the repeat width to estimate the panel circumference. If the result is noticeably off, change the hook or yarn and swatch again instead of forcing the fit. Estimate the number of body rows by multiplying the desired glove length (in inches or centimetres) by your row gauge in the same unit. These are planning estimates; the try-on is the final check.
Use the swatch to select a whole number of puff-V columns that gives a comfortable hand circumference. If the fabric feels stiff, try a larger hook; if it is floppy, try a smaller hook. Re-swatch after changing the hook. Do not pull the swatch hard to force a fit.
Abbreviations
ch chain; sc single crochet; sl st slip stitch; st(s) stitch(es); sp space; RS/WS right/wrong side; rep repeat; yo yarn over.
Special stitch: puff V
Puff: Yo, insert hook into the indicated space, yo and draw up a loop to the height of the surrounding stitches. Repeat the same draw-up motion twice more in that space. Yo and draw through all loops on the hook. Keep the loops even, but do not yank them tight.
Puff V: Work one puff in the indicated space, ch 1, then work a second puff in that same space. The ch-1 between the two puffs is the centre of the V. Follow the placement in the row instructions below. Different designers use different puff heights and chain counts; this definition belongs to this draft.
Pattern instructions
1. Ribbed cuff
Ch 9 (or a chain that gives your preferred cuff depth, about 2–2.5 in / 5–6.5 cm). Row 1: sc in the second ch from the hook and in each ch across; 8 sc. Ch 1, turn. Rows 2 onward: sc in the back loop only across; ch 1, turn. Continue until the strip, relaxed, measures the intended wrist circumference with enough negative ease to stay in place while still stretching comfortably over the hand. Join the short ends with sl sts or a yarn-needle seam to make a ring.
Try the cuff on before continuing. It should stay on the wrist without pinching and should stretch over the hand. The strip’s row-end edge is where the hand panel will be attached.
2. Set up the hand panel
Count the cuff rows and measure the relaxed cuff circumference. The hand is usually wider than the wrist, so the panel needs to expand from cuff width to palm width. Mark the midpoint of the cuff and the intended thumb side.
With the cuff laid flat, join yarn along its upper edge and pick up an odd number of sc evenly around the edge. Choose the pickup count for the wrist/cuff circumference using your gauge; the foundation mesh below turns this into a starting number of puff-V columns. Use your swatch to calculate the target number of columns for the palm. If the palm needs more columns than the cuff, add the difference gradually in the first few rows as described below. Keep pickup spacing even so the cuff join does not bunch.
3. Foundation mesh row
Turn the work so you can crochet the hand panel flat. Sc in the first picked-up stitch. Then repeat across: ch 1, skip the next picked-up stitch, sc in the following stitch. Adjust the last spacing as needed so the row ends with a firm sc anchor and the ch-1 spaces are evenly distributed. Count the ch-1 spaces; each one will hold one puff V. Place a marker at each row end.
4. Puff V-stitch rows
Row 1: Ch 1, sc in the first edge anchor. In each ch-1 space across, work one puff V. Sc in the next anchor after each puff V. End with sc in the last edge anchor; turn.
Row 2 and onward: Ch 1, sc in the first edge anchor. Work one puff V into the centre ch-1 space between the two puffs of each V from the previous row; sc in the next anchor. Repeat across and finish with sc in the final edge anchor. Turn.
Shape from wrist to palm: Compare the cuff-start width with the palm width calculated from your swatch. The difference is the number of puff-V columns to add. Distribute those additions over the first few rows, placing them evenly across the panel and away from the marked thumb seam. To create one new column for the next row, work sc, ch 1, sc into a selected anchor instead of one sc; on the following row, work a puff V into that new ch-1 space. Keep the remaining stitches in pattern. Add only as many columns as your measurements require, then work even rows. This shaping method is part of the untested prototype, so check the panel around the hand frequently.
Continue until the panel reaches the measured length from cuff to knuckles. Check the panel around the hand before finishing. It should wrap around the palm without pulling the puff columns flat. If it is too narrow or wide, adjust the number of columns and redo the foundation rather than forcing the seam.
5. Shape and seam the thumb opening
Place the panel around the hand with the cuff at the wrist. Mark where the thumb base meets the side edge. Seam the two long sides together from the cuff upward, leaving a gap centred at the marked thumb position. A practical starting point is to leave about 1.5–2 in / 4–5 cm unseamed, but the wearer’s thumb placement and the puff fabric’s stretch determine the final opening. Close the seam above the opening. Try the glove on before weaving in ends; enlarge or reposition the gap only as needed.
Repeat for the second glove and mirror the thumb opening. If you want the thumb opening centred rather than mirrored, mark and seam both gloves consistently. Do not sew the panel edges together through the thumb gap.
6. Finish
Try on both gloves. Check that the cuff stays put, the palm is not strained, the thumb moves freely, and the top edge does not cut across the fingers. Add a round of sc or sl sts around the thumb opening and top edge only if the edge needs stabilising; keep the edging loose enough not to narrow the opening. Weave in ends securely without drawing the fabric tight.
Fit troubleshooting
- Tight over the palm: add one or more puff-V columns, use a larger hook, or choose a more flexible yarn; swatch again.
- Loose or sliding: reduce a column if the repeat allows, try a smaller hook, or shorten the cuff strip.
- Cuff edge ripples where the panel joins: redistribute pickup stitches evenly or revise cuff length/panel width so the two edges match more closely.
- Thumb opening pulls: move the opening toward the thumb base or increase its length slightly; test the change while wearing the glove.
- Puffs look uneven: draw each puff loop to a consistent height and keep the same number of draw-ups throughout.
Video help for the stitch and construction
- Puff V-stitch tutorial — Hooked by Robin (stitch demonstration, not this glove pattern)
- Puff Stitch Fingerless Gloves — B.Hooked Crochet (related glove construction in a different puff stitch; not a V-puff pattern)
- Amona Crochet V-puff glove video (creator video referenced on the inspiration page)
Each creator’s stitch definition and directions may differ from this draft. Use one tutorial consistently and do not combine its counts with this made-to-measure prototype without checking a swatch.
Frequently asked questions
Are these gloves suitable for a beginner?
They are intended for a confident beginner who can make single crochet, work in back loops, count stitches, and seam neatly. Practise the puff V on a swatch before starting the gloves.
Is this a tested pattern?
No. This original draft has not been physically crocheted or fit-tested. It needs a sample-maker to check the cuff-to-panel join, stitch repeat, thumb placement, and finished fit before it is described as tested or sold as a final pattern.
Can I use any puff V stitch?
Not without re-swatching. Puff height, number of loops, and spacing vary among tutorials, which changes the width and thickness of the fabric.
Can I publish the supplied photos?
Only if you own the rights or have permission for the intended use. Keep the creator’s watermark and provide any required attribution; do not crop out or remove a watermark.